How to Choose Silicone Rubber for Mold Making?

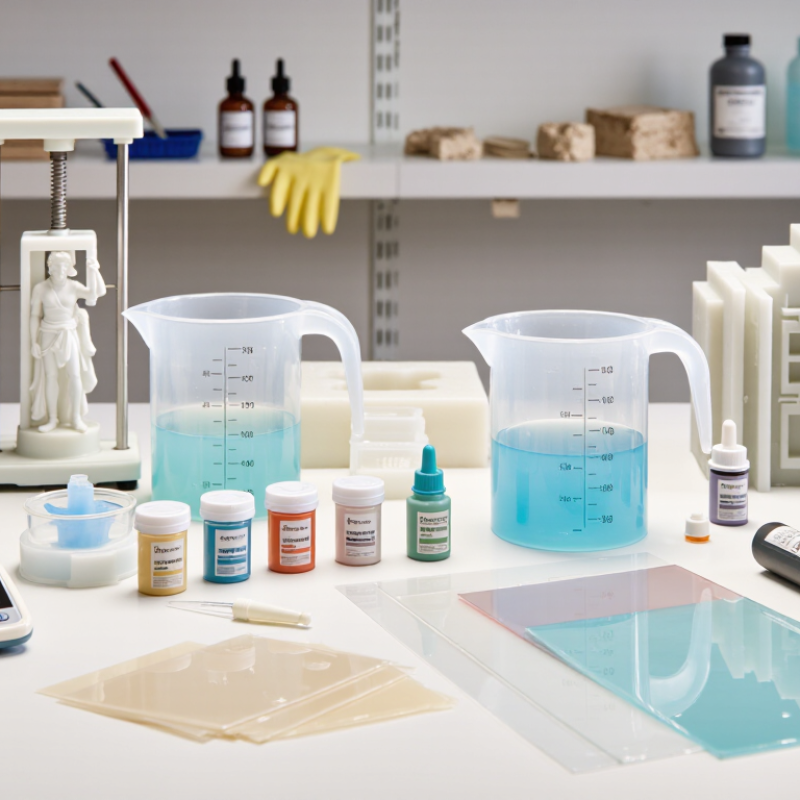
Choosing silicone rubber for mold making is not a simple matter of selecting the softest material. It requires attention to detail, curing behavior, tear strength, and the final casting process. A sharp miniature may need a low-viscosity silicone, while a large architectural mold may require stronger reinforcement and higher hardness.

Industry data shows why this material deserves careful evaluation. Grand View Research valued the global silicone market at approximately USD 18.5 billion in 2023. Its report also projects continued growth through 2030, supported by manufacturing, healthcare, construction, and consumer applications. Research and Markets similarly identifies silicone elastomers as a growing segment, although published estimates differ by scope and methodology. The figures are useful, but not perfect.

The practical lesson is clearer than the statistics.

Mold-making educator Alan R. Bechtold states, “A successful mold begins with understanding the material before mixing it.” This principle reflects workshop experience. Read the technical data sheet. Check the mix ratio twice. Measure the catalyst accurately. A small error can leave the mold tacky, brittle, or permanently under-cured.

For silicone rubber for mold making, platinum-cured and tin-cured systems each have strengths. Platinum silicone usually offers cleaner curing and lower odor, but it can suffer from inhibition. Tin silicone is often more forgiving and economical, yet it may shrink slightly over time. Surface condition matters too. Clay, wood, resin, and certain paints can all affect curing.

There is no universal winner. The best choice depends on detail, flexibility, production volume, and casting material. Even experienced makers occasionally choose incorrectly. That uncertainty deserves testing, not confidence alone.

How to Choose Silicone Rubber for Mold Making?

Silicone Rubber Basics for Mold Making

How to Choose Silicone Rubber for Mold Making?

Silicone Rubber Basics for Mold Making

Choosing silicone begins with the mold’s purpose, not a favorite product. For detailed textures, low-viscosity liquid silicone usually flows into fine grooves. A higher-viscosity material may hold vertical surfaces better, but it needs careful brushing or pouring. Shore hardness also matters. Soft silicone bends around undercuts and releases delicate casts easily. Firm silicone supports larger molds and sharper edges. Very soft rubber can deform during casting.

Cure chemistry deserves attention. Addition-cure silicone generally offers low shrinkage and predictable dimensions. Condensation-cure silicone can suit many projects, but its working conditions require closer checking. Read the technical data sheet for mix ratio, pot life, cure time, and recommended thickness. In my workshop experience, small test molds reveal problems that product descriptions miss. A surface may look smooth, yet remain tacky because of contamination, inaccurate weighing, or poor ventilation. I still occasionally underestimate cure time. That mistake is useful, though inconvenient.

Tips: Measure by weight whenever specified, mix slowly, and scrape the container walls. Apply a thin detail coat before adding the main layer. Use a release agent only after checking compatibility. Test a coin-sized sample first. Keep notes on temperature and humidity. These details make later batches more consistent.

Key Properties to Match With Your Mold Requirements

How to Choose Silicone Rubber for Mold Making?

Key Properties to Match With Your Mold Requirements

Choosing silicone rubber starts with the mold’s working conditions, not the product label. For fine textures, use a low-viscosity material that can flow around letters, pores, and narrow corners. A vacuum chamber can reduce trapped bubbles, but it is not always available. Plan for that limitation.

Hardness affects both detail and handling. Softer silicone can release undercuts more easily, while firmer silicone supports tall or heavy patterns. Tear strength matters when the mold has thin walls or repeated demolding. Do not judge hardness alone. A firm mold may still tear at a sharp edge.

Check the service temperature carefully. Heat from casting materials can shorten mold life or distort weak silicone. Review shrinkage data when dimensional accuracy matters. Even small changes can affect fitted parts. The mixing ratio must also be measured by weight, not guessed by eye. Small errors may leave sticky areas.

Cure time influences production speed, but faster is not always better. Rapid curing can reduce working time and trap air during detailed pours. In workshop trials, the first test mold should be small. It reveals flow, cure behavior, surface release, and unexpected distortion. Some choices will fail. That failure is useful when the test records temperature, mix ratio, and demolding time.

How to Choose Between Tin-Cure and Platinum-Cure Silicone

Choosing Silicone Rubber for Mold Making: Tin-Cure or Platinum-Cure?

The right silicone depends on your pattern, production volume, and required accuracy. Tin-cure silicone is often forgiving and cost-effective for general molds. It usually tolerates many model materials and cures with fewer surface problems. Its flexible rubber works well for plaster, wax, soap, and decorative casting. However, it can shrink slightly over time and may have a shorter working life.

Platinum-cure silicone offers excellent dimensional stability and long-term elasticity. It suits detailed molds, repeated casting, and parts requiring precise measurements. Its surface can remain cleaner during extended use. Yet, it is more sensitive to inhibition from sulfur clay, amines, latex, and some coatings. Always test a small sample first. That step saves material.

I once assumed a smooth pattern would guarantee a perfect cure. That assumption was wrong. The pattern contained a hidden contaminant, leaving a tacky surface near one edge. Careful cleaning, accurate weighing, and thorough mixing matter more than appearance suggests. Follow the stated mix ratio closely, and control room temperature and humidity. Vacuum degassing can reduce bubbles, but it is not always necessary for simple shapes. Tin-cure may be the practical choice for quick prototypes, while platinum-cure is stronger for stable, repeatable production. Your mold design still matters. Thin walls, sharp corners, and poor support can cause failure with either system.

How to Choose Silicone Rubber for Mold Making? — How to Choose Between Tin-Cure and Platinum-Cure Silicone

Selection Dimension Tin-Cure Silicone Platinum-Cure Silicone Practical Guidance
Curing Chemistry Condensation-cure system. The silicone cross-links through a reaction that typically uses an organotin catalyst. Addition-cure system. The silicone cross-links through a platinum-catalyzed hydrosilylation reaction. Choose according to the required dimensional stability, surface quality, and compatibility with the pattern material.
Reaction By-Products Usually releases alcohol or another low-molecular-weight by-product during curing. Does not normally release a volatile reaction by-product during curing.
Typical Linear Shrinkage Commonly about 0.2%–0.6%, depending on formulation, mold thickness, cure conditions, and post-cure behavior. Commonly about 0.05%–0.2%, with many formulations at or below approximately 0.1%. Always verify the technical data sheet when the mold is used for precision casting or close-tolerance replication.
Typical Shore A Hardness Approximately Shore A 10–40 for many mold-making grades. Approximately Shore A 10–60 for many mold-making grades. Soft grades improve demolding of undercuts; harder grades provide better support for large or flat molds.
Mixing Ratio Often supplied as a base and catalyst system, commonly mixed by weight in ratios such as 100:5 or 100:10, but the ratio is formulation-specific. Usually supplied as two components mixed at equal or near-equal ratios, commonly 1:1 by weight or volume; the exact ratio is formulation-specific. Use only the stated manufacturer ratio. Small ratio errors can cause incomplete curing or altered physical properties.
Typical Working Time Often about 5–45 minutes at room temperature, depending on catalyst level and formulation. Often about 5–60 minutes at room temperature, depending on the selected system and temperature. Use a slower system for complex patterns and a faster system for repetitive production work.
Typical Demolding Time Often about 4–24 hours at room temperature. Often about 2–24 hours at room temperature. Actual demolding time depends on mold thickness, ambient temperature, catalyst level, and the specific product.
Dimensional Stability Good for general-purpose molds, but shrinkage can be higher and may continue as volatile by-products leave the cured rubber. Very good dimensional stability because the curing reaction normally produces no volatile condensation by-product.
Detail Reproduction Can reproduce fine surface detail effectively when properly degassed and applied to a clean, compatible pattern. Can reproduce very fine detail effectively and is often selected for high-fidelity duplication. Detail depends on viscosity, mold design, degassing, application technique, and pattern surface quality—not chemistry alone.
Viscosity Options Available in pourable and brushable grades; many systems can be thickened for vertical surfaces. Available in pourable, brushable, and thixotropic grades; some systems are designed for vacuum or pressure processing. Low-viscosity materials flow around intricate details; thixotropic materials are useful for blanket or brush-on molds.
Tear Resistance Many mold-making grades provide good tear resistance, commonly in the approximate range of 15–35 kN/m. Many mold-making grades provide good to very good tear resistance, commonly in the approximate range of 15–40 kN/m. Compare the specified tear strength together with elongation and hardness when the mold contains deep undercuts.
Elongation at Break Often approximately 200%–600%, depending on hardness and formulation. Often approximately 200%–700%, depending on hardness and formulation. Higher elongation generally makes it easier to remove flexible molds from complex shapes.
Resistance to Inhibition Generally less sensitive to cure inhibition from sulfur, amines, tin compounds, and some contaminants. More sensitive to inhibition from sulfur-containing modeling clays, latex, amines, some adhesives, wood contaminants, and certain coatings. Perform a small compatibility test before applying platinum-cure silicone to an unfamiliar pattern or coating.
Pattern Compatibility Typically compatible with many cured resins, metals, plastics, plaster, and sealed porous materials. Compatible with many substrates, but porous materials and chemically active surfaces may require sealing and testing. Clean, dry, fully cured, and properly sealed patterns reduce adhesion and inhibition problems.
Suitable Casting Materials Commonly used for plaster, gypsum, concrete, wax, soap, and many resin systems after compatibility testing. Commonly used for plaster, gypsum, wax, soap, concrete, and many resin systems; excellent dimensional stability benefits repeated casting. Check whether the casting material releases heat or contains chemicals that may shorten mold life.
Heat Resistance Many cured grades withstand approximately 150–200°C for intermittent or continuous service, depending on formulation. Many cured grades withstand approximately 150–200°C for intermittent or continuous service, depending on formulation. Do not select by cure type alone; use the specified continuous-use and peak-temperature ratings for the intended process.
Food-Contact or Skin-Contact Projects Not automatically suitable. A formulation must have the appropriate regulatory documentation for the intended contact. Not automatically suitable. A formulation must have the appropriate regulatory documentation for the intended contact. Cure chemistry does not by itself establish food-contact, medical, or skin-contact compliance.
Ease of Use Often forgiving of minor surface contamination and can be economical for general-purpose mold making. Often convenient because many systems use a simple equal-part mix, but surface contamination control is critical. Choose tin-cure for robustness and cost sensitivity; choose platinum-cure when process control and repeatability are priorities.
Relative Cost Generally lower initial material cost for comparable mold-making hardness and performance. Generally higher initial material cost, offset in some applications by lower shrinkage and longer production consistency. Evaluate total cost, including pattern rework, rejected castings, mold life, and production repeatability.
Best Use Cases General-purpose prototypes, decorative molds, plaster and wax casting, short production runs, and projects with moderate precision requirements. Precision duplication, detailed masters, long production runs, complex undercuts, and applications requiring low shrinkage. Match the silicone to the required accuracy, expected number of castings, pattern chemistry, and budget.
Primary Advantages Lower cost, broad pattern compatibility, good flexibility, and relatively low inhibition risk. Very low shrinkage, excellent dimensional stability, long-term consistency, and strong detail reproduction. Neither chemistry is universally superior; the best option depends on the project requirements.
Primary Limitations Higher shrinkage, possible post-cure dimensional change, and potential odor or residue from released by-products. Higher cost and greater sensitivity to contamination or cure-inhibiting materials. Read the technical data sheet and conduct a small test pour before making a full-size mold.

Note: The numerical ranges are representative values for general mold-making silicone formulations. Actual performance varies by formulation, mixing accuracy, temperature, humidity, mold geometry, and curing conditions.

Selecting the Right Silicone Hardness, Viscosity, and Cure Time

Choosing silicone rubber for mold making requires balancing hardness, viscosity, and cure time. Each property changes how the material behaves around your pattern. In practical workshop testing, I mix a small sample before committing to a full mold. This simple step reveals bubbles, flow problems, and unexpected surface reactions. Datasheets provide useful limits, but real patterns often expose details that numbers cannot predict.

Silicone hardness should match the mold’s shape and removal method. Soft silicone bends around deep undercuts and delicate textures. However, it may flex during casting and produce less consistent dimensions. A firmer grade supports flat walls and repeated handling, but it can tear small projections during demolding. I once chose a soft material for a tall, thin mold. The surface detail looked excellent, yet the mold distorted under its own weight. That choice was not ideal. Consider both flexibility and structural support.

Viscosity controls how easily silicone fills narrow grooves. Low-viscosity material usually surrounds fine details with less manual pressure. Higher-viscosity silicone can stay on vertical surfaces, but it may trap air near sharp corners. Gentle brushing onto the pattern can reduce this risk. Cure time also affects production rhythm. Fast curing helps urgent repairs, while slower curing allows more working time and careful bubble release. Room temperature, mixing accuracy, and humidity can change the result. Test it first. Record the mixing ratio, temperature, and actual demolding time for future batches.

Testing, Handling, and Storing Silicone for Reliable Molds

How to Choose Silicone Rubber for Mold Making?

Reliable molds begin with a small material test, not a large production pour. Check the silicone’s cure system, hardness, viscosity, and working time. A soft silicone captures undercuts well, while firmer silicone supports larger, flatter molds. Read the technical data sheet carefully. Do not estimate the mixing ratio by eye.

Test a spoonful against the pattern material before making the full mold. Some clays, coatings, wood treatments, and resins can inhibit curing. Mix slowly, scraping the container walls and bottom. If possible, remove trapped air in a vacuum chamber. Pour in a thin stream from one corner. This helps the silicone rise around fine details. My first test was too small to reveal surface inhibition. That mistake still matters.

Wear suitable gloves and eye protection during mixing. Keep the workspace clean, dry, and ventilated. Moisture, dust, and residue can damage the result. Store unopened containers upright in a cool, dry place. Seal partly used containers immediately, and keep the lids with their original containers. Record the opening date and batch information. A simple label prevents uncertain guesses later. Rotate older material before newer stock. If the silicone becomes unusually thick, develops lumps, or cures unevenly, test it again before use. Sometimes the storage area, not the silicone, is the real problem.