When it comes to enhancing and protecting various surfaces, rubberized dip coating has emerged as a popular choice among both professionals and DIY enthusiasts. This innovative technique offers a robust layer of protection against environmental factors, enhancing grip and aesthetics simultaneously. Whether you are looking to coat tools, automotive parts, or household items, mastering the art of rubberized dip coating is essential for achieving lasting results. However, applying this coating effectively requires a combination of the right techniques, tools, and preparation.
In this guide, we will explore ten essential tips that can help you apply rubberized dip coating like a pro. From the importance of surface preparation to mastering application techniques, each tip aims to provide valuable insights that can significantly improve the quality and durability of your projects. By following these guidelines, you will not only ensure a smooth finish but also enhance the overall performance of the rubberized dip coating, making it a worthwhile investment in your maintenance and enhancement endeavors. Whether you are a novice or an experienced user, these strategies will empower you to achieve professional-looking results with ease.
Rubberized dip coating is a versatile process that involves the application of a protective rubber-like layer to various surfaces, enhancing durability and resistance to environmental factors. This coating is commonly used in a multitude of applications including automotive parts, tools, and even outdoor furniture. The primary advantage of rubberized dip coating is its ability to provide a non-slip surface, which not only improves grip but also protects underlying materials from scratches, corrosion, and moisture damage. The flexibility of the coating allows it to adhere to irregular shapes, making it suitable for both intricate and large items.
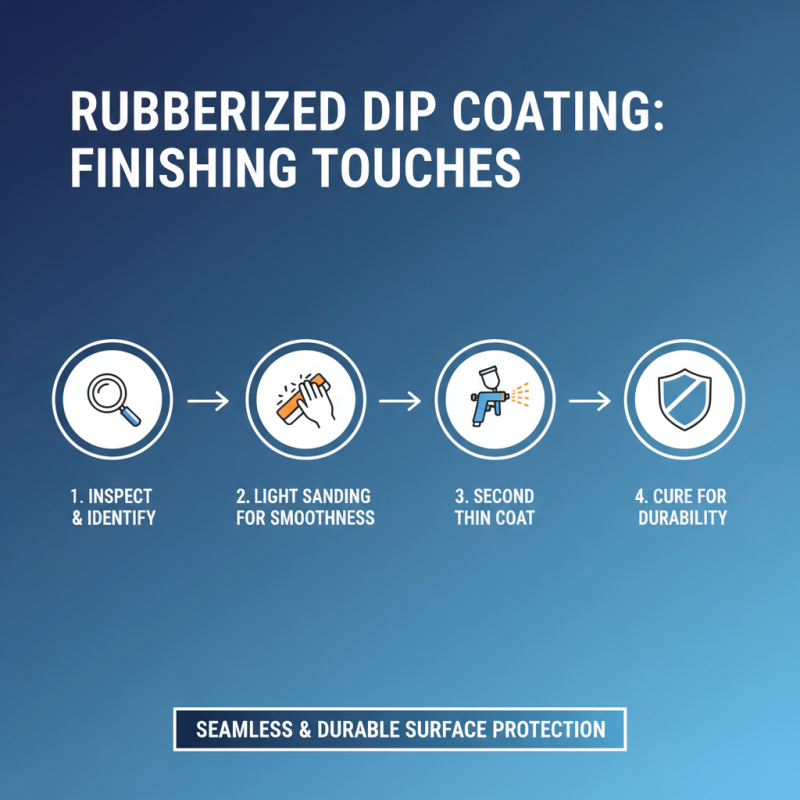
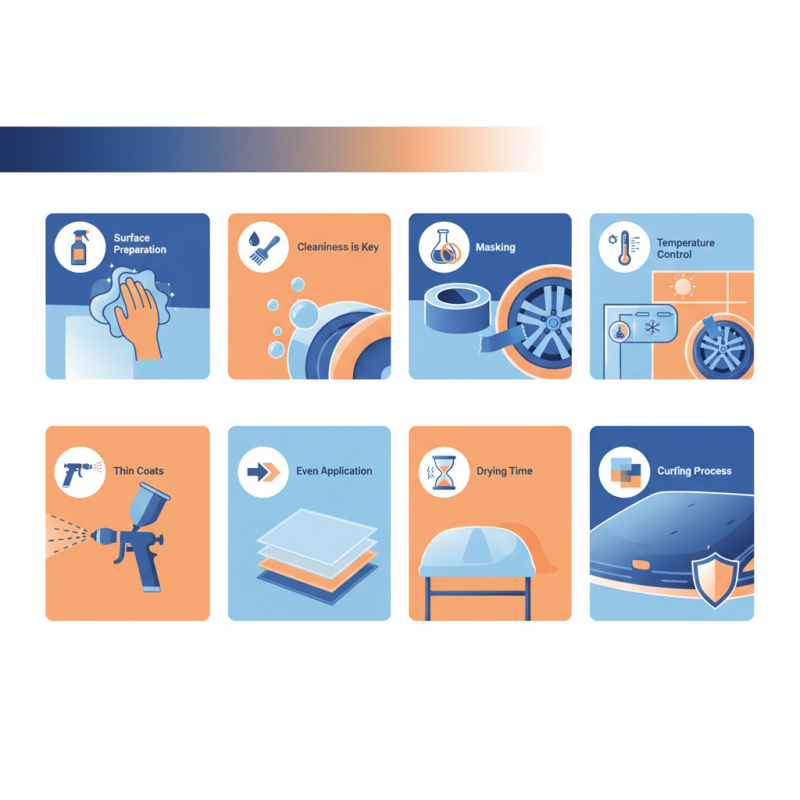
In terms of application, the process typically involves immersing the item in a dip solution, allowing the rubberized material to evenly coat the surface. This method can create a thick, robust barrier, promoting longevity and performance. Proper surface preparation is crucial for optimal adhesion, which may involve cleaning, sanding, or priming the item before dipping. Understanding the characteristics of the coating, such as its curing time and temperature sensitivity, is also essential for achieving professional results.
This process not only enhances the functionality of various products but also allows for creative customization, making rubberized dip coating a popular choice for DIY enthusiasts and professionals alike.
When embarking on a rubberized dip coating project, selecting the appropriate type of coating is critical to achieve optimal results. The two primary categories of rubberized coatings—water-based and solvent-based—each offer distinct advantages and limitations. According to industry reports, water-based coatings tend to provide better environmental compliance due to lower volatile organic compounds (VOCs), making them safer for indoor applications. Additionally, market data indicates that water-based coatings hold around 45% of the total market share, reflecting growing consumer preference for eco-friendly options.
Moreover, the specific requirements of your project should dictate the choice of rubberized dip coating. For instance, if the application involves high-stress environments where wear resistance is crucial, a heavy-duty, solvent-based dip may be the better choice, as they typically exhibit superior durability. Research shows that solvent-based coatings can deliver a thickness of up to 20 mils, significantly enhancing protection against physical abrasion and chemical exposure. According to a study published in the Journal of Protective Coatings and Linings, effective coating thickness is directly linked to longevity and performance, emphasizing the need to evaluate project demands carefully before making a selection.
Preparing surfaces properly is crucial for achieving optimal adhesion with rubberized dip coating. The first step in this process involves thorough cleaning. Any dirt, grease, or residues on the surface can severely hinder the adhesion of the coating. Use a suitable cleaner, such as a degreaser, to remove contaminants, and ensure that the surface is completely dry before application. For particularly challenging materials, like metals, consider using abrasive pads or sandpaper to roughen the surface. This micro-texture provides more surface area for the coating to grip, ensuring a stronger bond.
Once the surface is clean and prepped, ensure that it is free from moisture. Humidity can affect the way the rubberized coating adheres, potentially leading to peeling or bubbling once cured. A gentle wipe with a dry cloth can eliminate any residual moisture. Additionally, it's beneficial to perform a test spray on a small area to identify any potential issues with adhesion. Taking these preparatory steps will set a solid foundation for the coating application and greatly enhance the durability and performance of the finished product.
Rubberized dip coating is a popular technique for enhancing the durability and appearance of various surfaces, making it a preferred choice among both DIY enthusiasts and professionals. To achieve a flawless application, it is critical to follow a systematic step-by-step process. First, ensure your surface is clean and free of contaminants. This can enhance adhesion, which is paramount; studies show that an improved surface preparation can increase the coating's bond strength by up to 40%.
Once the surface is cleaned, the next step is to prepare your rubberized dip coating material according to product instructions. Proper temperature control is also essential, as the coating's viscosity and flow behavior are affected by ambient temperatures. Research indicates that applying coatings at temperatures between 65°F and 85°F can significantly enhance the film thickness and uniformity, allowing for up to 20% better application results.
When you're ready to apply, immerse the item in the coating solution slowly and steadily to prevent bubbles and ensure an even coat. Allow excess material to drip off before repositioning the item for a second dip, if necessary. After application, curing time is crucial; most coatings require a minimum cure time of 24 hours to reach optimal hardness and durability. Following these steps can lead to a professional-grade finish that extends the life of your projects, with data suggesting that well-applied rubberized coatings can last up to three times longer than untreated surfaces.
When applying rubberized dip coating, the finishing touches are crucial for ensuring a seamless and durable surface. Once the primary coating process is complete and fully cured, inspect the surface for any imperfections or irregularities. A light sanding can help smooth out any rough spots, enhancing both the appearance and functionality of the coating. It’s also beneficial to apply a second thin layer of the dip coating to achieve a more uniform finish and additional protection against wear and tear.
Maintenance of rubberized coated surfaces is vital for preserving their longevity and effectiveness. Regular cleaning is essential to remove dirt, dust, and grime, which can accumulate over time. Use a mild soap solution and a soft cloth for cleaning to avoid damaging the coating. Additionally, inspect the surfaces periodically for signs of wear such as peeling or chipping. In case of minor damage, touch-ups can be easily performed by applying more of the rubberized dip coating to the affected areas, ensuring your surfaces remain protected and visually appealing for years to come.